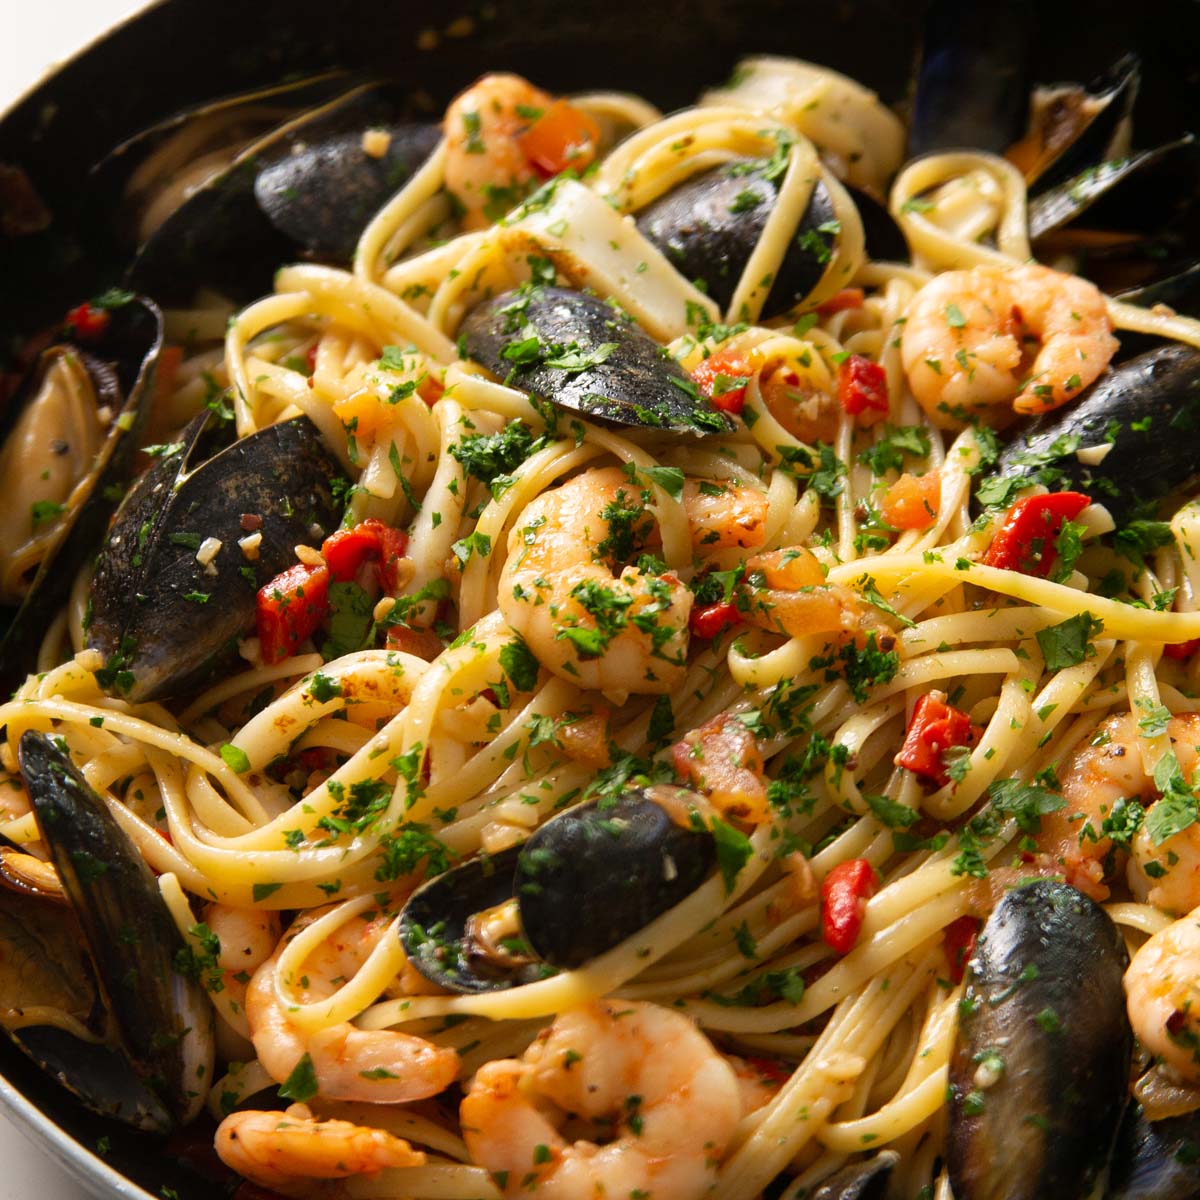
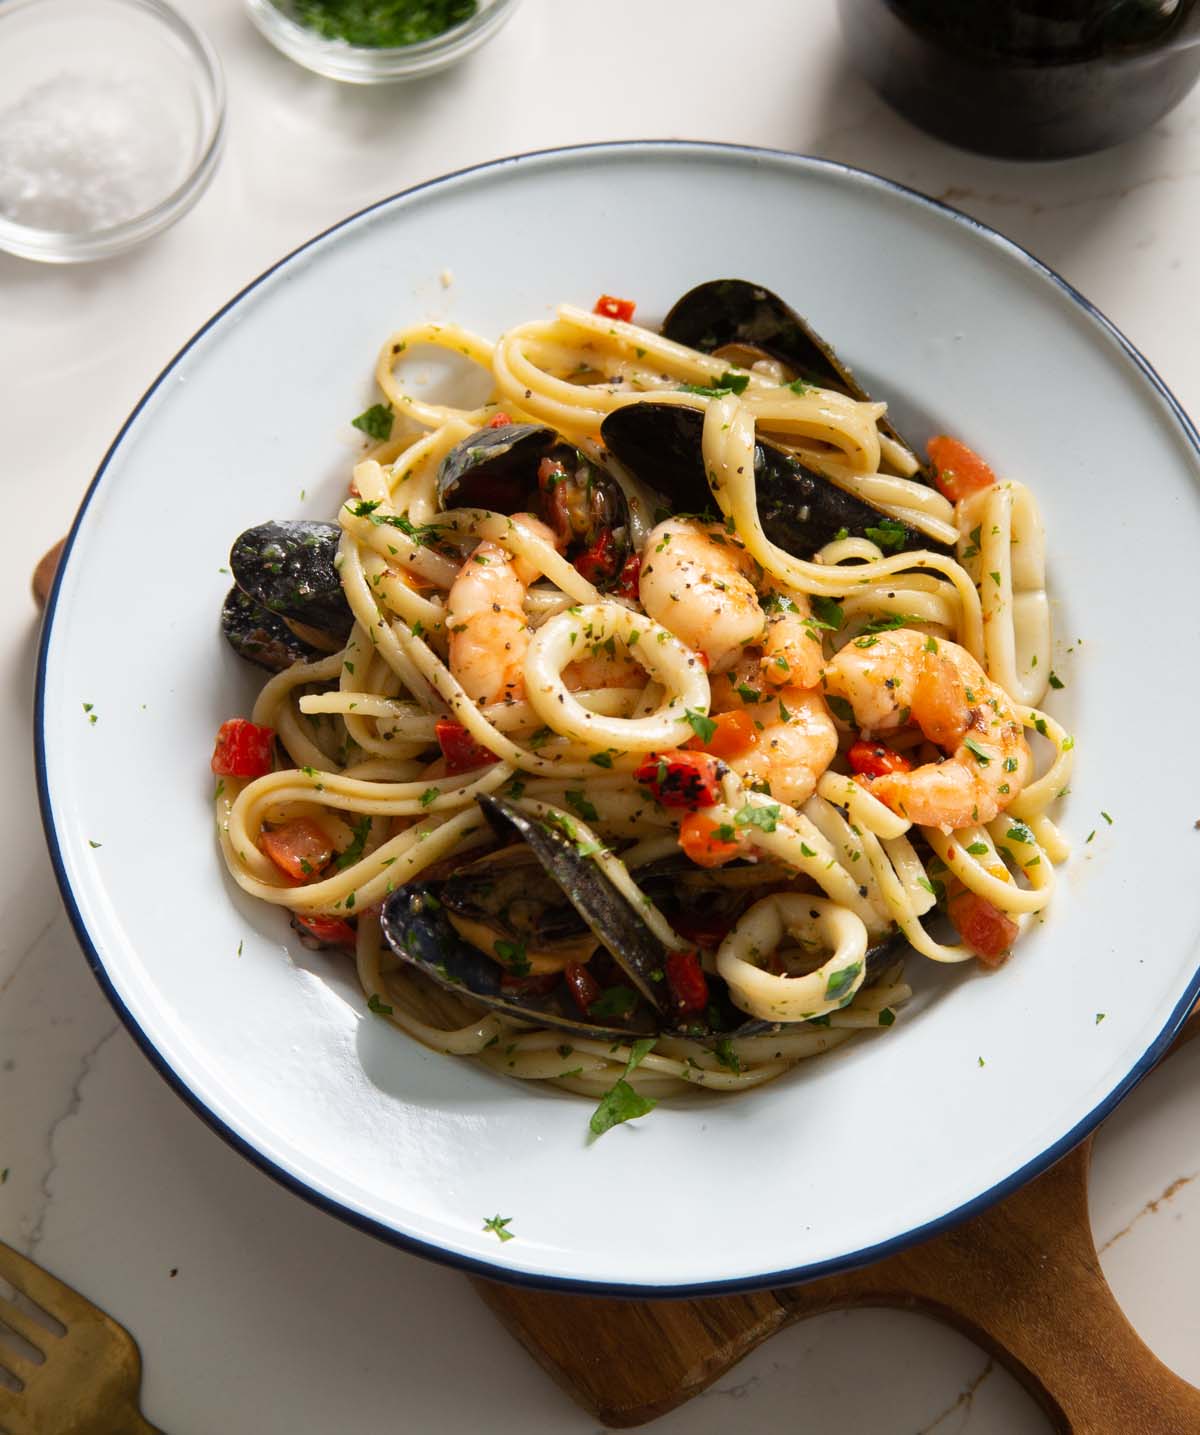
Looking for a seafood pasta thatâs worthy of your favourite restaurant? This oneâs rich, buttery and surprisingly easy to make at home.
What sets the recipe apart from the rest is how easily it comes together – no fancy techniques or ingredients, just around 30 minutes of your time, a hungry belly, and you’re on your way. Follow me…
Italian Seafood Pasta
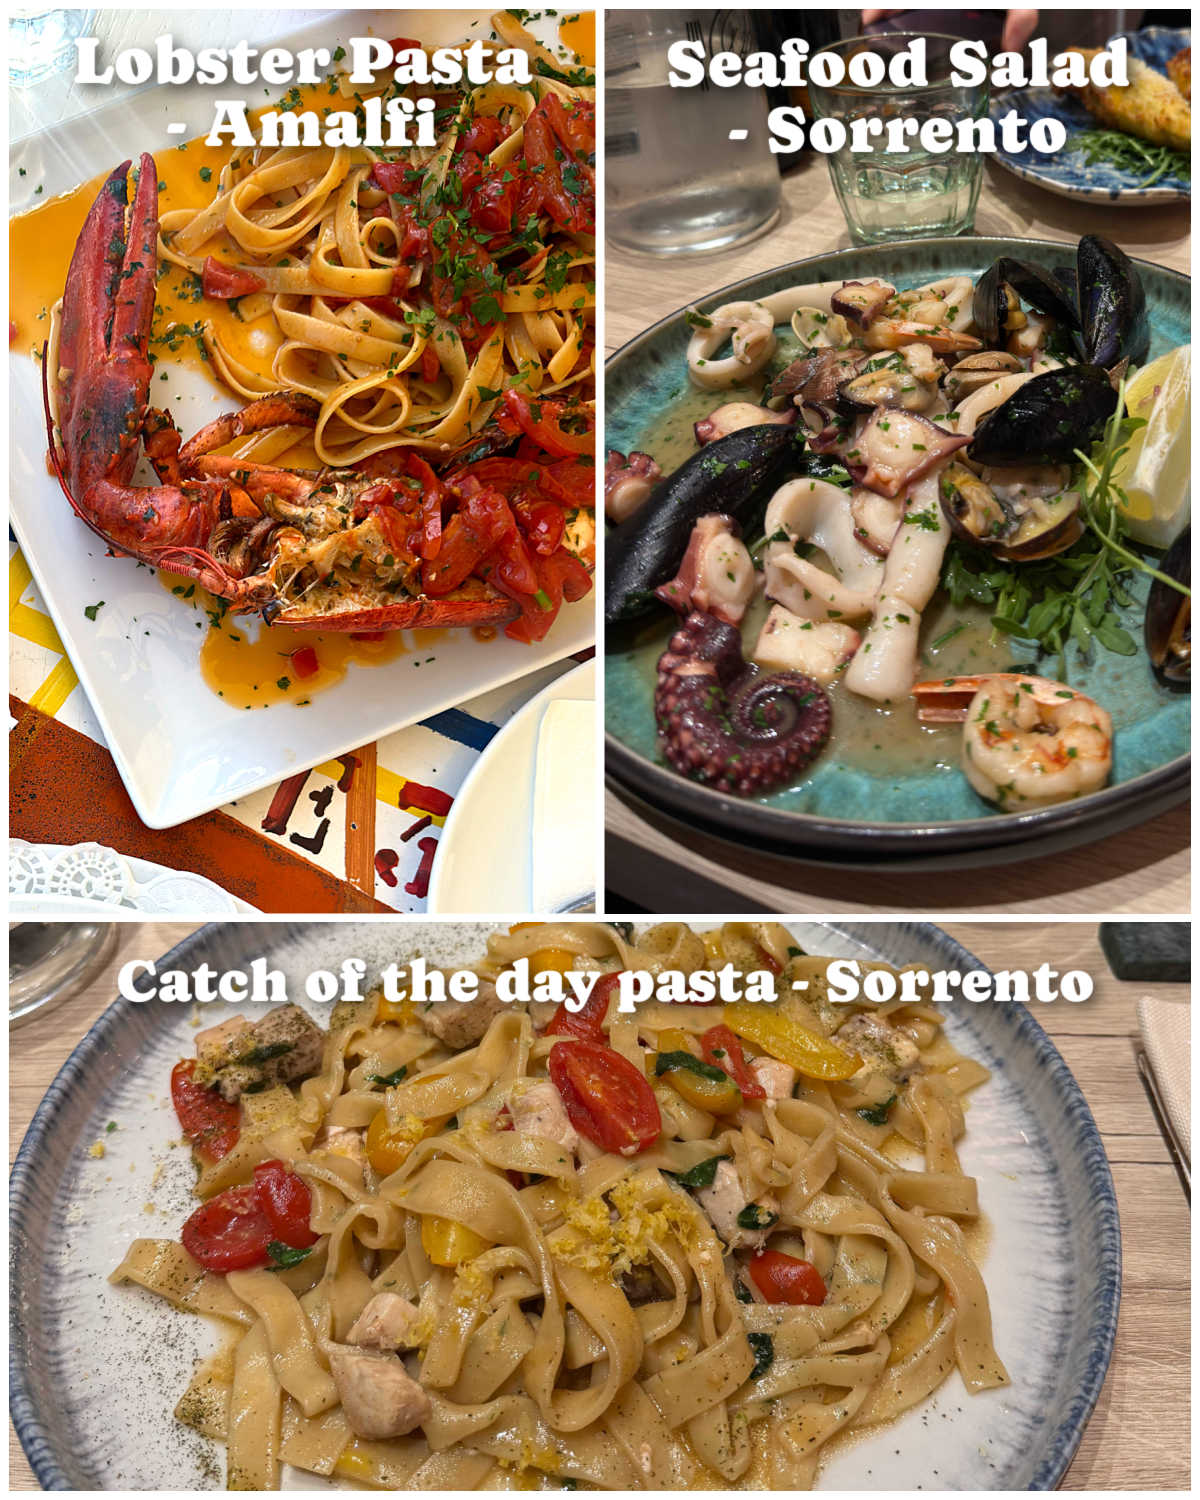
I’ve recently come back from a trip to Italy, where we visited the southern coast. Naturally, I was dreaming up new recipes the entire time, including this seafood pasta. I ate a fair few seafood dishes, but there were 3 in particular that stood out and helped me develop this recipe:
- Lobster Pasta in Amalfi – this was actually one of my favourite dishes of the whole trip. One of the things I loved so much was the inclusion of diced red peppers.
- Seafood Salad in Sorrento – I loved the mussels in this recipe, alongside the generous amount of garlic butter.
- Catch of the day pasta in Sorrento – this gave me the initial idea to add tomatoes to the recipe. I also loved the amount of lemon zest in the recipe.
Seafood Pasta Ingredients
With that in mind, here are the ingredients I landed on to make the best seafood pasta imaginable. The full quantities are in the recipe card below, but just to quickly go over what we’re using and why:
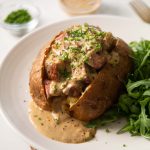
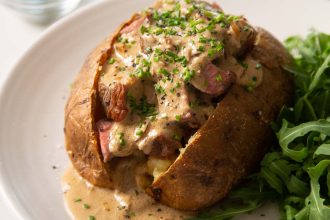
- Mussels – For me, these are a must in seafood pasta. Visually, they really complete the dish. They’re also incredibly affordable!
- Calamari – For a second seafood element, calamari works great. It cooks very quickly, bulks out the pasta and takes on the flavours of the sauce so beautifully.
- Prawns/Shrimp – The star of the show. These are the ‘treats’ in the recipe that everybody digs for. IMO no shrimp = no seafood pasta.
- Butter – This is the backbone of the sauce and of course pairs delightfully with seafood.
- Garlic – Butter sauce is great, but a garlic butter sauce is even better. This adds bags of flavour to the dish.
- Chilli Flakes – These add a nice bit of heat to the dish that brings everything to life. You can work these in to taste.
- Parsley – Lots of parsley is essential in a buttery, garlicky seafood dish!
- White Wine – This is used to cook the mussels. It also helps balance the sauce by cutting through the richness of the butter.
- Lemon Zest – I love stirring this through right at the end to really freshen things up. It lifts the dish and brings out the best in the seafood.
- Roasted Red Peppers – These add a lovely Mediterranean element to the dish.
- Tomatoes – The tomatoes also bring a Mediterranean vibe. They freshen up the dish too.
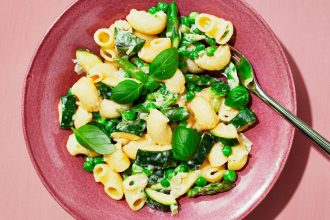
- Linguine – This is the classic pasta to use for seafood pasta, but, realistically, any long-cut pasta would work.

Recipe Tip
You can absolutely use frozen calamari and prawns/shrimp if you’d like, which will typically be more affordable than fresh. You’ll just need to thaw them before cooking. Also take into consideration that the weight will decrease slightly as they thaw.
Preparing Seafood Pasta
Since the seafood is the star of the show, it’s important to get it right. Each one is incredibly easy to prep, but just a few tips to help along the way:
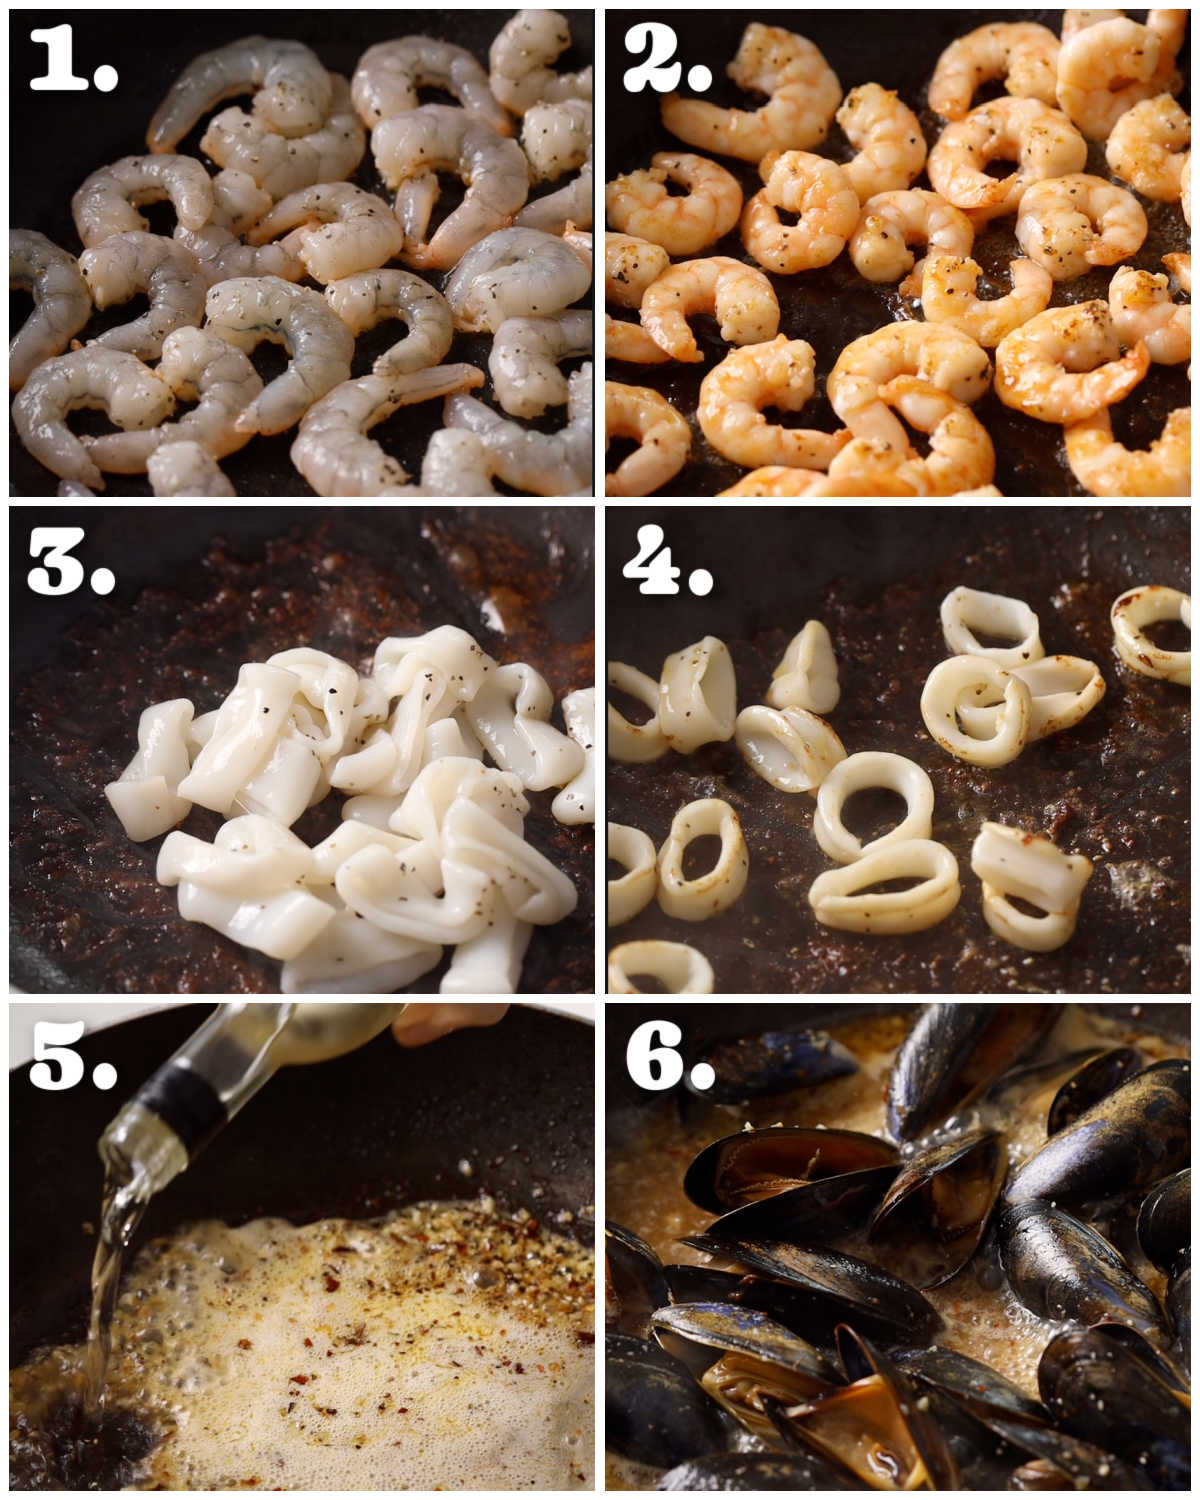
- Prawns/Shrimp – I recommend buying them peeled so they’re ready to rock and roll. You’ll want to pat them dry to remove excess moisture (so they don’t steam in the pan). I also recommend frying them over high heat for just a minute on each side to get some colour. They’re cooked when they tighten to a ‘C’ shape.
- Calamari – Again, just pat this dry, then fry over high heat. This won’t take long to cook; you just want to develop some colour.
- Mussels – These are typically sold ready to cook, but just check the shells and scrub them if needed. These will be cooked in the wine and are ready to remove as soon as they open up.
In all cases, the seafood won’t take long to cook, and keep in mind it’ll carry on cooking as it rests to the side and when added back to the pan.
Process shots: fry prawns/shrimp (photos 1&2), fry calamari (photos3&4), fry garlic and chilli flakes, then cook mussels in wine (photos 5&6).
How to make Seafood Linguine
Once the seafood is cooked, you’re on the home straight. A few crucial steps for success:
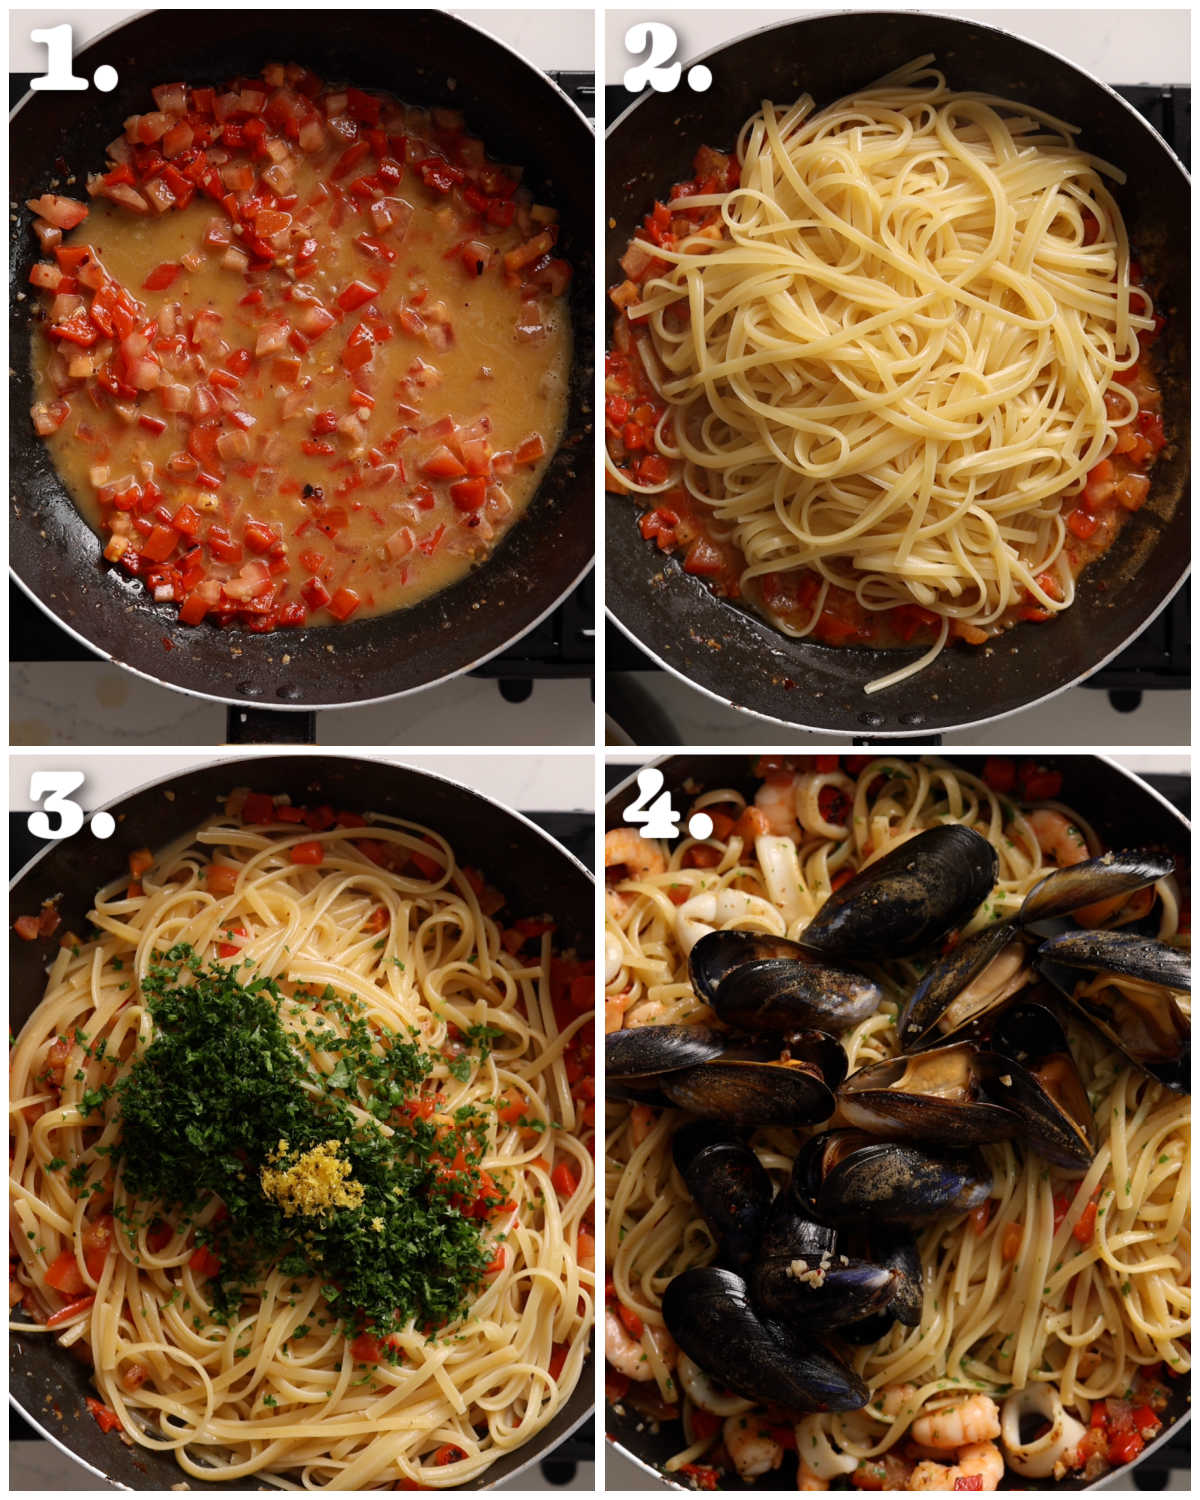
- Toss toss toss – the sauce will be pretty watery at the start, but the more you toss the pasta, the more it’ll reduce and thicken up. The end result should be a light, glossy sauce that clings to the pasta. It shouldn’t be watery at all.
- Pasta water – I like to transfer the cooked pasta straight from the pot into the pan. That way you have a full pot of leftover pasta water ready to use should the sauce dry up, or you need to loosen up the pasta.
- Resting juices – as the cooked seafood rests on a plate, a pool of juices will likely form around it. Make sure you add this in with the pasta – it’s free flavour!
Process shots: fry tomato and roasted red pepper in butter (photo 1), toss in linguine (photo 2), toss parsley and lemon zest (photo 3), toss in seafood (photo 4).
Seafood Pasta Serving Suggestions
You’ll want to plate up fairly quickly, because the sauce will continue to thicken and dry up. I love finishing with extra fresh parsley, but it’s optional.
If you’re looking for an extra something, then consider these options:
- Bread – Crusty bread, Focaccia or even Garlic Bread.
- Salad – Simple green salad of some variety (or even a Rocket Salad).
- Veggies – Some roasted veggies on the side would go delightfully.
- Wine РA crisp, cold glass of white or ros̩!
Alrighty, let’s tuck into the full recipe for this seafood pasta shall we?!
How to make Seafood Pasta (Full Recipe & Video)
-
Sharp Knife & Chopping Board
-
Large Deep Pan & Wooden Spoon
-
Large Pot & Tongs (for cooking pasta)
-
Paper Towels (for drying seafood)
Prevent your screen from going dark
-
Add the pasta to salted boiling water and cook until al dente.
-
Keeping them separate, pat the prawns and calamari dry to remove excess moisture. Season both with a pinch of salt and pepper.
-
Add a drizzle of oil to a large pan over high heat. Once hot, space out the prawns and leave to fry for 1 minute until light golden on one side. Flip them over, cook for another minute, then remove from the pan. Top up with oil if needed, then space out the calamari and fry for 1 minute until it begins to firm up and take on some colour. Toss a few times during. Remove and place to one side, then lower the pan heat to medium.
-
Melt 1 tbsp of the butter, then add the garlic, chilli flakes and black pepper and fry for 30 seconds or so (be careful it doesn’t burn). Pour in the wine and bring to a rapid simmer.
-
Immediately add the mussels to the wine and leave to cook until they start to open up, shaking the pan now and then to encourage them. Remove the mussels as and when they open and place on a plate to one side. You’ll want to reduce the wine for around 4 minutes in total, so if the mussels are all cooked before that, continue simmering the wine to reduce it down (the harsh smell of alcohol should vanish).
-
Lower the heat back to medium and melt in the rest of the butter. Add the tomatoes, roasted red pepper and a good pinch of salt and fry for a couple of minutes, stirring as you go.
-
At this point, the pasta should be al dente, so turn the pan heat to low and use tongs to transfer the pasta straight from the pot into the pan, embracing any excess pasta water that comes with it. Give it a toss, then add the parsley (save some to serve) and lemon zest and continue tossing until the liquid thickens into a light, glossy sauce that clings to the pasta. The sauce shouldn’t be watery at all.
-
Toss in the prawns and calamari, then add in the mussels, bringing any resting juices along the way. If the pasta dries out at any point, just toss in some leftover pasta water to loosen it up.
-
Check for seasoning and adjust (generously) if needed, then serve up with extra parsley and enjoy!
b) Calamari – Again, you don’t want to fry this long, just because it’ll carry on cooking after it’s fried. The frying stage is mainly to just about cook them through, but also a chance to develop some colour (extra flavour).
c) Mussels prep – You can get mussels in supermarkets/fish mongers, typically served in packs. Most will already be prepped, but if you notice any that need to be scrubbed, do so with a dishwashing scrub under COLD water (otherwise they’ll start to cook/open). If they have any wiry bits (i.e. beard), just use your fingers to pull them off.
d) Cooking the mussels – The mussels are cooked as soon as they open up. I like to use 20 mussels (12oz/350g), which ideally results in at least 4 per person. Some might not open; I typically just discard those (they’re safe to eat but you’ll need to ply them open).Â
e) Roasted Red Pepper – I typically buy a jar of roasted red peppers and use one of those. These work great because you get the added flavour of the brine too. You could use a fresh pepper; you just need to char it all over on the stove or under the broiler/grill. Then, place in a bowl and tightly cover in cling film. You can then remove the aggressive bits of char once the pepper cools.
f) Calories – Whole recipe divided by 4.
Calories: 638kcal | Carbohydrates: 71.96g | Protein: 40.72g | Fat: 19.35g | Saturated Fat: 10.042g | Polyunsaturated Fat: 2.264g | Monounsaturated Fat: 4.704g | Trans Fat: 0.584g | Cholesterol: 335mg | Sodium: 723mg | Potassium: 1078mg | Fiber: 9.6g | Sugar: 1.96g | Vitamin A: 1569IU | Vitamin C: 106.4mg | Calcium: 115mg | Iron: 5mg
For more similar recipes, check out these beauties:
Pasta Recipes with Seafood
PakarPBN
A Private Blog Network (PBN) is a collection of websites that are controlled by a single individual or organization and used primarily to build backlinks to a “money site” in order to influence its ranking in search engines such as Google. The core idea behind a PBN is based on the importance of backlinks in Google’s ranking algorithm. Since Google views backlinks as signals of authority and trust, some website owners attempt to artificially create these signals through a controlled network of sites.
In a typical PBN setup, the owner acquires expired or aged domains that already have existing authority, backlinks, and history. These domains are rebuilt with new content and hosted separately, often using different IP addresses, hosting providers, themes, and ownership details to make them appear unrelated. Within the content published on these sites, links are strategically placed that point to the main website the owner wants to rank higher. By doing this, the owner attempts to pass link equity (also known as “link juice”) from the PBN sites to the target website.
The purpose of a PBN is to give the impression that the target website is naturally earning links from multiple independent sources. If done effectively, this can temporarily improve keyword rankings, increase organic visibility, and drive more traffic from search results.